HOW TO TRANSFER MOTOR VEHICLE OWNERSHIP ONLINE
For change of ownership, the buyer and the seller should create an account in the TIMS system. All Citizens with eCitizen accounts will sign in with their respective eCitizen credentials to complete the TIMS account creation process.
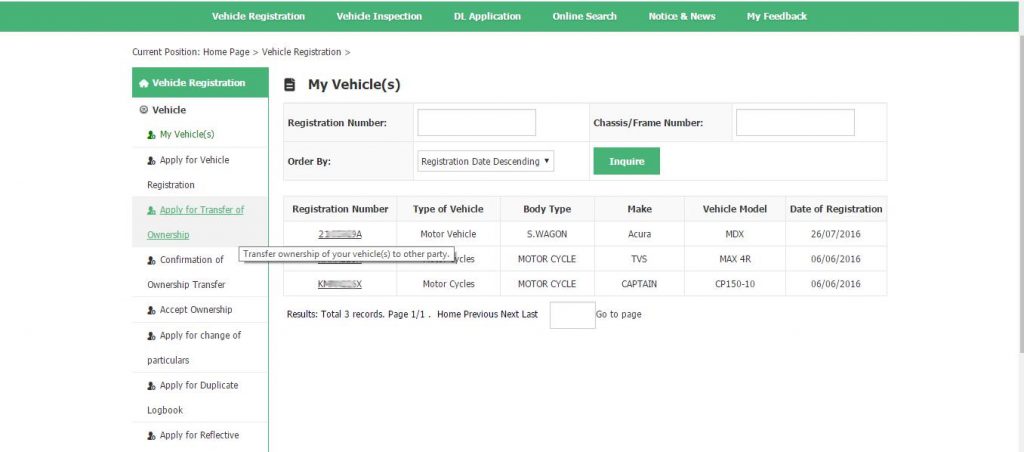
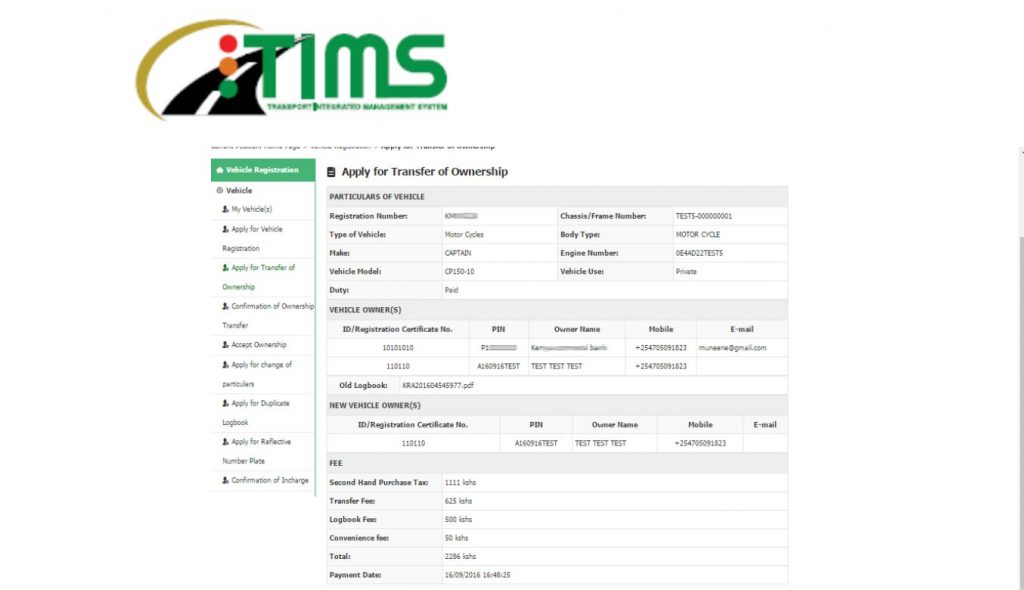
Step 1: Click on Apply for Transfer of Ownership in the menu to view records of vehicles transferable, pending transfer and completed transfer.
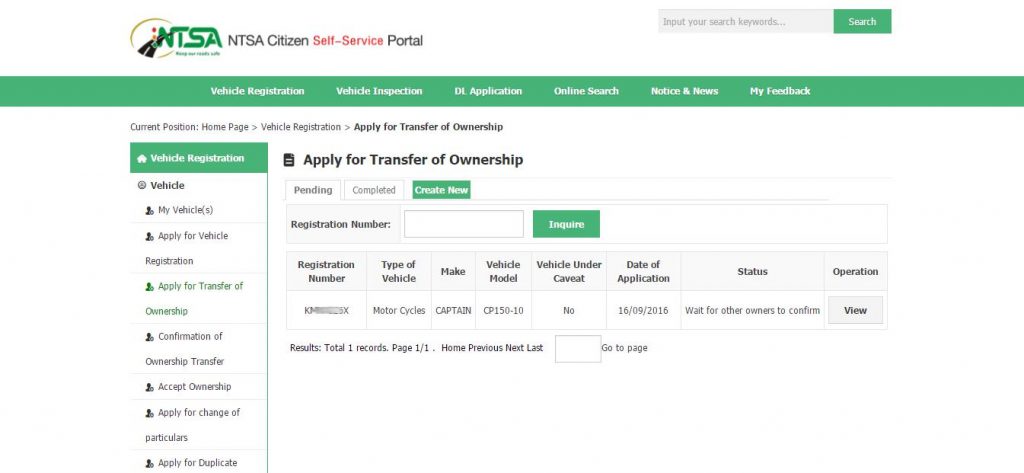
Click on Create New button, type the registration number of the vehicle you want to transfer and click on Inquire button. This page shows the basic information of the vehicle to be transferred including the original owner.
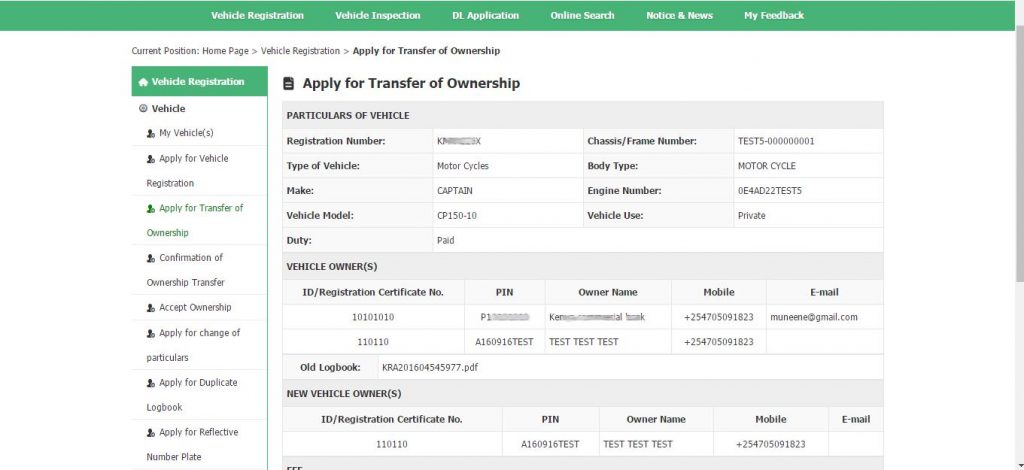
- Upload a scanned copy of the logbook.
- Under new vehicle owner’s the seller should select Individual / Non Individual / Financier then enter buyer’s details, the buyer can either be an individual, company or a financial institution. For Individuals enter National ID/Alien ID and PIN; and for Company/Financial Institution enter PIN and click on the Add button.
- Go to security verification, select Email/Mobile and click send verification code enter verification code from your Email/Mobile.
- Tick on disclaimer displayed.
- Click next, the page shows the basic information of the vehicle to be transferred including the new owner’s details.
- If the seller needs to modify the transfer information, click on the Modify button to modify the transfer information,( in case you wish to delete or cancel the application click on Delete button)
- Click on submit to complete the application, then click on Pay button, select one of the payment methods(MPESA, Debit/Credit/Pre-paid card, E-agent or cash).
Confirmation of ownership transfer by other owners
NOTE: 1. Other owners(of the same vehicle) log into the web portal;
- After the first owner applies for transfer and makes payment, the other owners will see information of vehicle transfer. If the seller is bank users, confirmation by other owners is not required in order to transfer the vehicle bought with loan and the procedure directly proceeds to 2.3 Buyer confirmation process.
Menu: Vehicle Registration -> Confirmation of Ownership Transfer
Step 1: Click on Confirmation of Ownership Transfer in the menu and this page will display the vehicles to be transferred, as shown in Fig. 2-27.

Step 2: Click on the plate number in the list page to view details of vehicle transfer, as shown above, the page shows basic information of the vehicle, information of the original vehicle owners, information of the new vehicle owners and safety verification information.
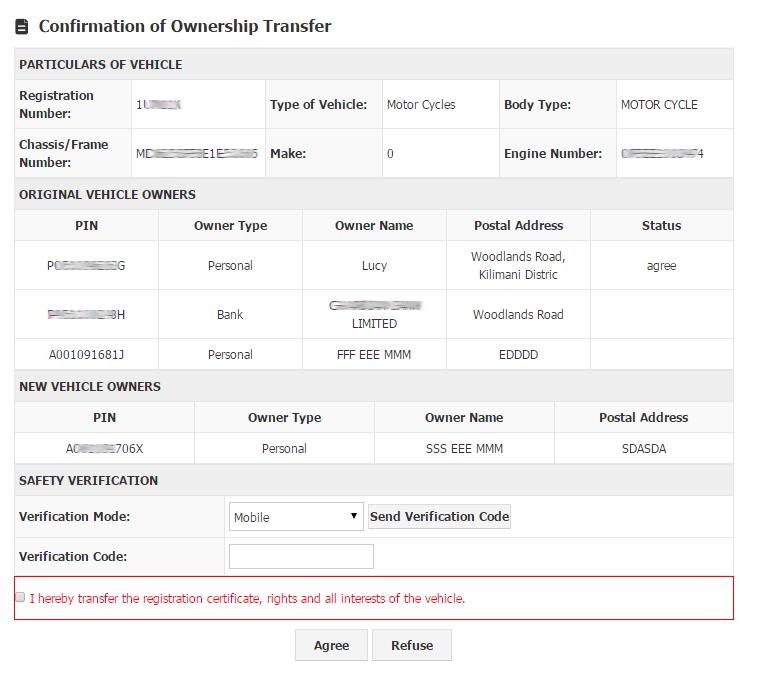
Step 3: Safety Verification must be done before operation of Agree or Refuse to transfer out. Choose Verification Mode (Mobile or Email), click on Send Verification Code and the system will send verification code to the owner’s mobile phone or email. After the owner fills in the correct verification code, he can choose to click on Agree or Refuse to transfer out.
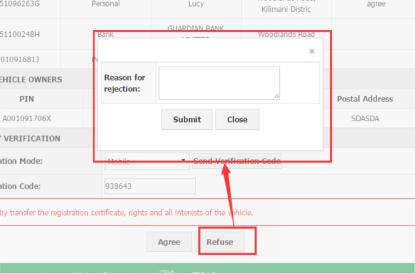
Step 4: If clicking on the Refuse button to refuse the transfer, specific Reason for Rejection needs to be filled out, as shown below; if click on the Agree button to agree on the transfer, the transfer procedure will proceed to the owner verification stage.
BUYER ACCEPTS OWNERSHIP
Buyer logs in the web portal;
After all the sellers agree to transfer the vehicle out, the buyer will see information of the vehicles to be transferred out.
Menu: Vehicle Registration -> Accept Ownership
Step 1: Click on Accept Ownership in the menu and the page will display information list of the vehicles to be transferred out, as shown in
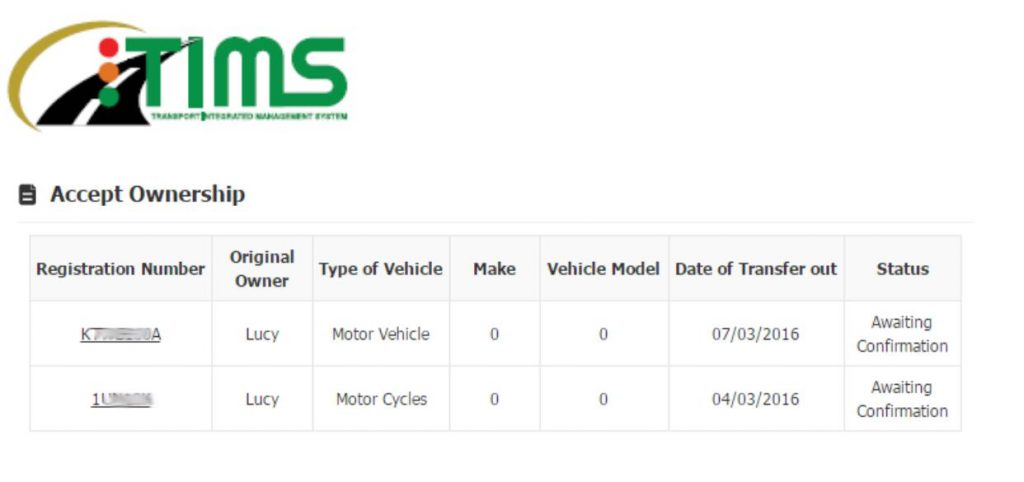
Fig. 2-30 Information list of vehicles to be transferred out
Step 2: Click on the plate number in the list page to view Particulars of Vehicle to be transferred out, as shown below
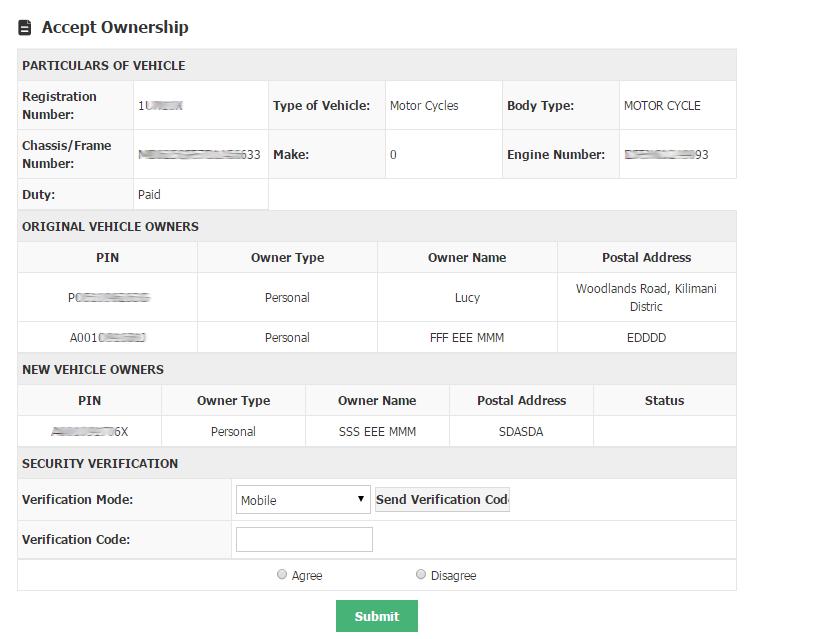
Step 3: After the buyer confirms the vehicle information is correct, Safety Verification must be done first in order to perform Agree or Disagree operation. Select the Verification Mode (Mobile or Email) and click on
Send Verification Code, the system will send the verification code to the user’s mobile phone or email, fill in the correct verification code and choose to click on Agree or Disagree on the transfer.
Step 4: If clicking on the Disagree button to reject the transfer, specify Reason for disagree needs to be filled in, as below; if clicking on the Agree button to agree on the transfer, fill in registration information below and then click on Submit to proceed to the next step.
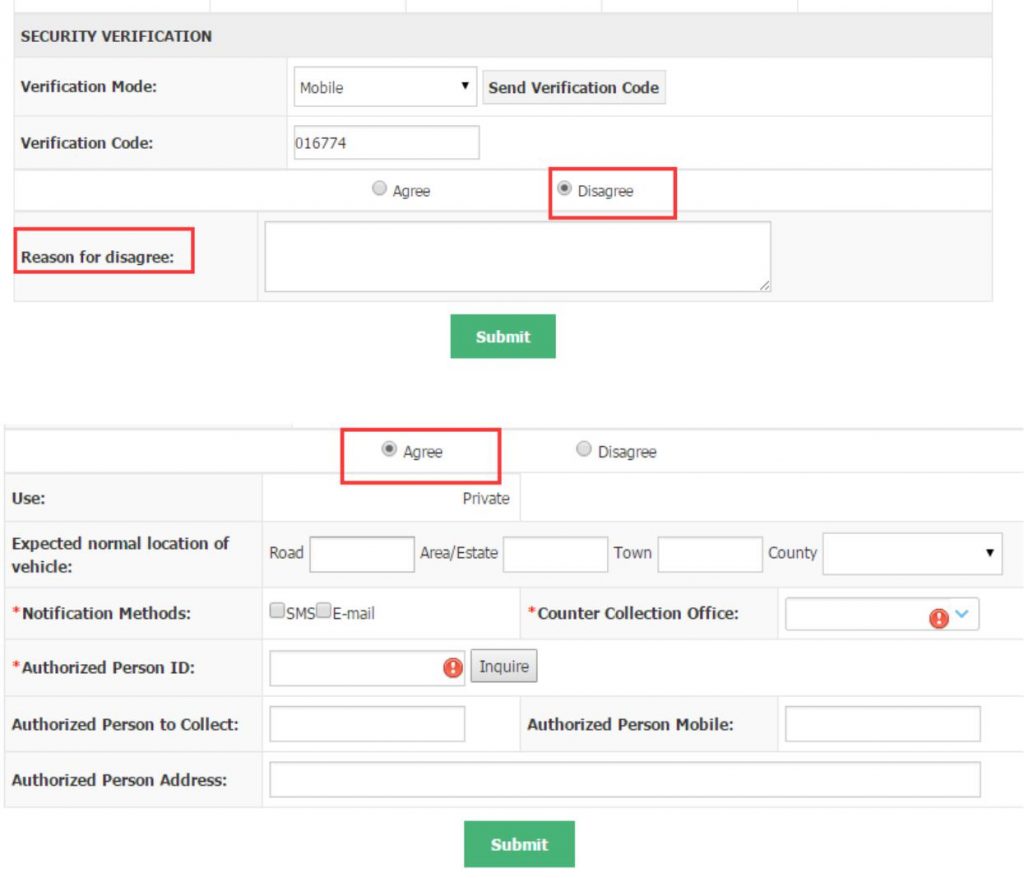
Step 5: If there is more than one buyers, the first buyer logs in and fills in the registration information, other buyers log in and confirm by simply selecting Agree or Disagree, after all the other buyers agree, submit for NTSA review; if there is only one buyer, Agree on the transfer above to submit for NTSA review.

Do you have any news or article you would like us to publish? Kindly reach us via outreach@t4d.co.ke or howtodoafrica@gmail.com.
